If you’re a frequent reader of the site, you may have noticed some changes around here recently. There’s been a subtle redesign: the theme’s header is less cluttered, I’ve done away with the sidebar and I’ve bumped up the font size a bit. I’ve also consolidated several pieces of information that were scattered all around the place into one, very specific location: the all-important About page.
The look
This is what Analog Senses used to look like on a Mac:
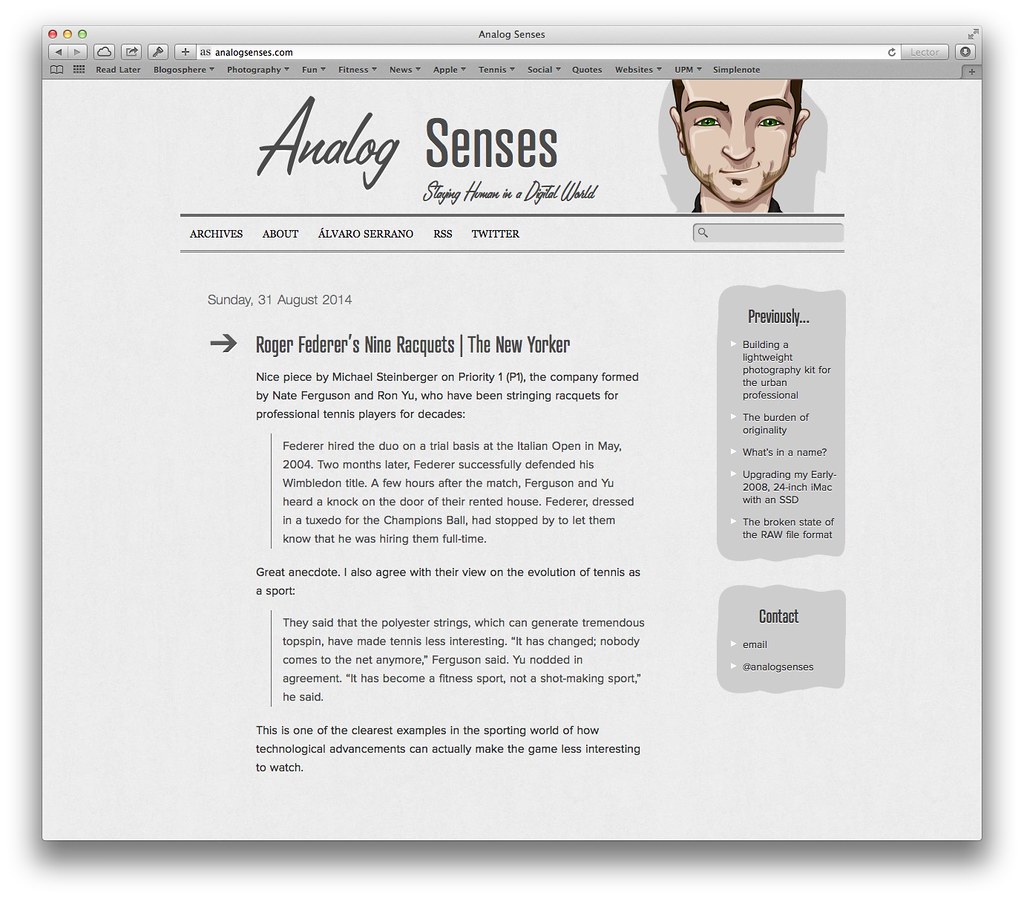
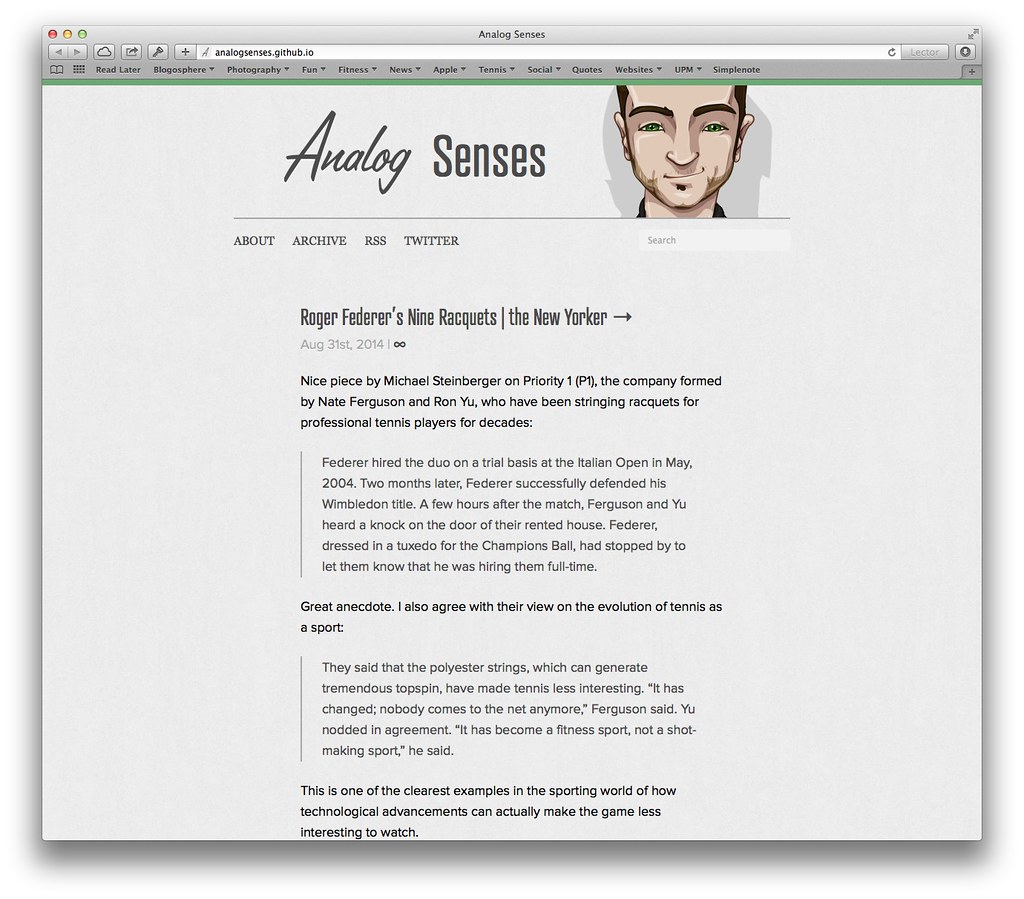
And this is what it looks like now:
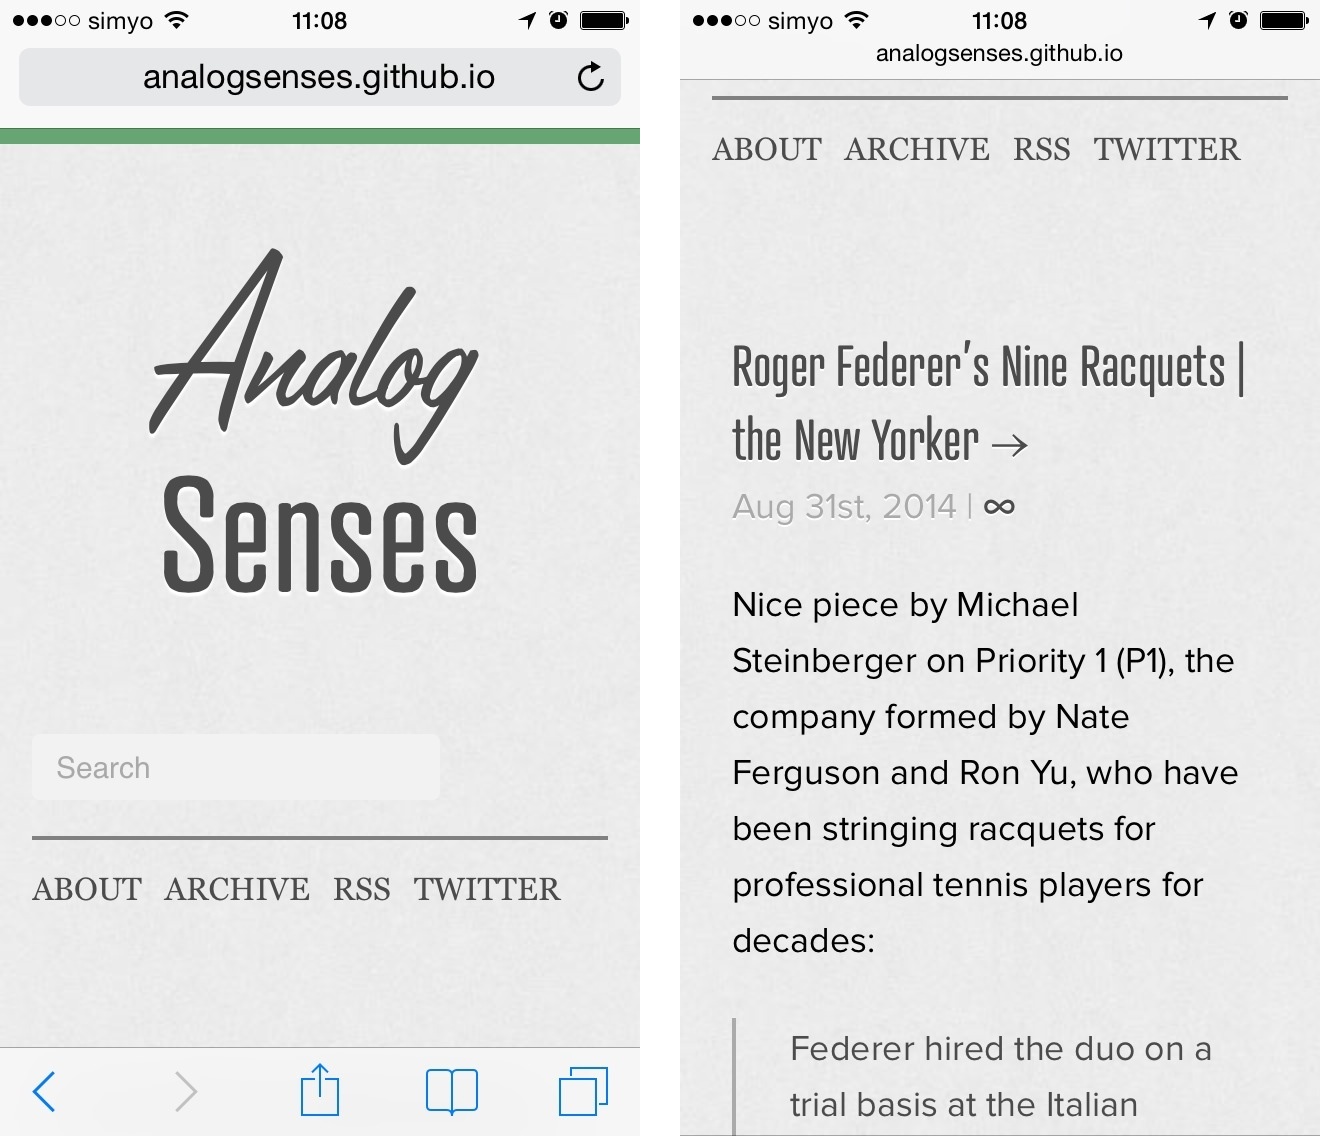
This is what it used to look like on an iPhone:

And what it looks like now:
And finally, before on an iPad:
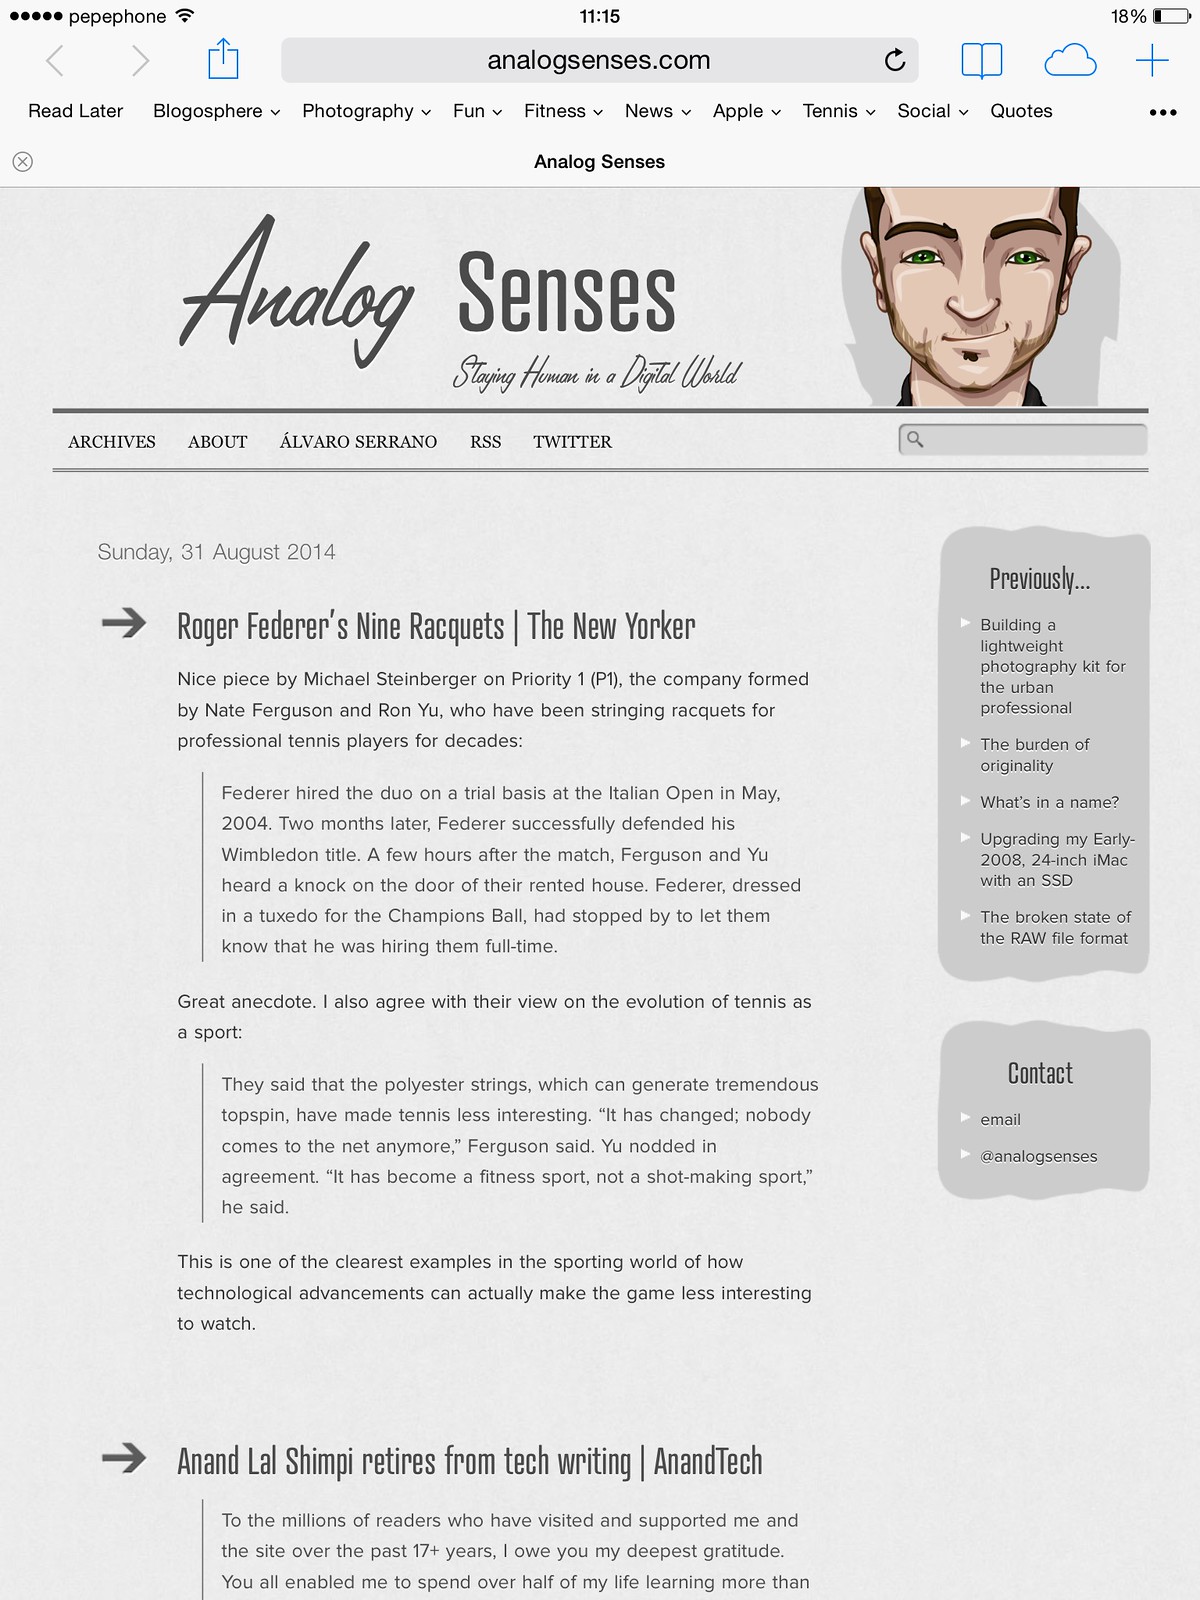
And now:

Those are fairly minor cosmetic changes, but I believe they add up to a more relaxed, more enjoyable reading experience for the site. At least, that was one of my intentions when I started tinkering around. It’s also now a responsive design (which I believe was long overdue), so you should be able to read Analog Senses on your device of choice without compromising the experience. All things considered, I believe this is a substantial improvement and I’m quite happy with how it turned out.
The feel
What you may not have noticed yet is that the site’s performance has also improved dramatically. Pages should load considerably faster, and response times should be significantly lower. Here’s a speed test comparison:
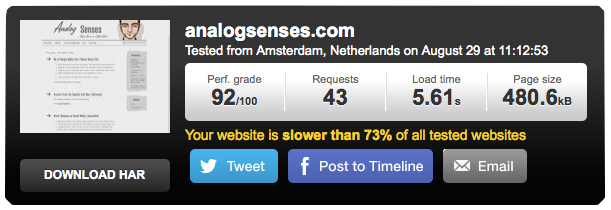
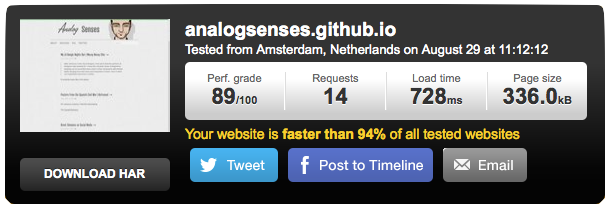
That’s a loading time over 7 times faster than before. There’s a good explanation for that: Analog Senses is no longer powered by WordPress on the back-end, and is instead entirely static HTML generated by Octopress, a blog-aware framework built around Jekyll. 1
This process of generating a static website is commonly known as “baking”, and I’m far from being the first person to do it. Of course, you give up certain features in return, but in my case I believe the tradeoff is more than worth it.
The reason I decided to do this was twofold: first, I had become unsatisfied with the site’s performance and second, I wanted a more secure, more scalable solution that wouldn’t require me to spend a small fortune in hosting costs.
One of my recent articles was linked to by The Brooks Review and The Newsprint, among others. The traffic influx I received was enough to make my server crumble under the pressure, even with W3 Total Cache installed. It didn’t go completely dark, but it became very unresponsive, and I’m obviously not happy with that. I suspect my shared hosting plan was at least as guilty as WordPress itself, if not more. Fixing it would’ve probably required me to upgrade to a more expensive hosting plan, or ditch WordPress altogether. In the end, I chose to do both.
The entire codebase of the site is now in a Git repository hosted on GitHub and served by GitHub pages. This setup is not only much faster, more secure and robust than my previous hosting service, it’s also free. This means I no longer need to pay for a dedicated hosting plan for the site, which translates into savings of over $100/year (and substantially more as traffic increases). Thanks to Git’s built-in version control, I sleep better at nights, too.
The Baking Process
Migrating Analog Senses from WordPress and into Octopress was not trivial. Fortunately, there are many excellent resources available online from generous people who have gone to the trouble of documenting their prior experiences. In the following sections I will try to add my own two cents by providing a detailed description of the process I followed, with the hope that it will be helpful (or at least informative) to somebody else. 2
To install Octopress and migrate my old posts, I followed this great article by Jian Zhen. That is an excellent place to start if you’re planning to migrate your own WordPress site.3
As Zhen recommends, I exported all entries from my old WordPress site with exitwp, and I imported them into Octopress without any issues. The only thing I needed to do was to edit _config.yaml to change the default permalink structure to match my old permalinks. I also edited sources/_include/custom/navigation.html to remove the redundant /blog link from the site and add links to my other pages. I was now set to start customizing my Octopress install.
I began by selecting a theme that would minimize the amount of customization needed to recreate a similar experience to what I had with WordPress. There are many excellent Octopress themes available, so look around for a while and you’re guaranteed to find something to your liking. I went with Readify, by Vladi Gleba.
After tweaking the design, it was time to import my webfonts. Analog Senses uses two typefaces from Typekit: Atrament Web and Proxima Nova. In order to use them with Octopress I updated and republished my kit as per Typekit documentation, and included the script in my sources/_include/custom/head.html file. I also changed sass/custom/_fonts.scss and sass/custom/_styles.scss to apply the new fonts to my theme.
Additionally, Analog Senses uses another webfont from MyFonts: Lamplighter Script. To get that to play nice with Octopress, I followed these instructions by Lee Hutchinson about how to properly declare the typeface using the @font-face CSS method.
With aesthetics and typography mostly set, the next challenge on the list was to handle the Link posts. WordPress has a built-in Post Formats feature that lets you easily customize different styles for different types of posts (articles vs. links vs. quotes, in the case of Analog Senses). However, despite having a specific doc page for this very feature, Octopress doesn’t do this out of the box. It looks like they decided to leave this for theme developers to implement. Apparently, there is still a branch in the Git repository which implements that feature, but it’s not the master branch and therefore it’s not what I had cloned. Fortunately, this great post by Jonathan Poritsky explains how you can implement it yourself and it’s really not that difficult.
The problem with the way the Link posts are handled is that you need to manually add an external-url field to the YAML front matter in every Link post. Yes, every single one of them. There’s probably a script somewhere to automate that, but I wanted to do it myself, since it was a good opportunity to revisit old entries and make sure that everything was still functioning. This was the most tedious and time-consuming step in the whole process, but I powered through it and after a couple days I was done.
Then it was time for the RSS feed. Like most WordPress sites, my old feed was located at /feed, but in Octopress the default location is /atom.xml. In order to make it compatible with the previous feed so as to not inconvenience long-term subscribers, I followed these instructions by Luosky.
Now I was almost done, but there were still a few details I wanted to tweak. In order to improve the experience, I use several pieces of software that provide additional features. These are:
Octopress Responsive Video Embed by Udo Kramer. This plugin allows me to responsively embed videos from several popular services, such as YouTube and Vimeo, so they can be played on smaller devices without any problems.
Octopress Spotify Play Button by Marc Riera. It allows to embed songs, albums and playlists from Spotify. The maximum width of these elements is fixed at 300px, so there’s no need for responsiveness here.
Footnotes Popover by Matt Gemmell. This Javascript code presents HTML footnotes as popovers that can be scrolled and dismissed. It’s great for reading footnotes without losing your place in the article.
Unfortunately, as Syeong Gan points out, there is a problem in the way Octopress handles footnotes: when the same number is used for a footnote definition more than once in the same page, only the first instance of each number will be properly displayed. This can can lead to some errors, particularly on the index page. Luckily, he provides an easy fix in the form of his Footnotes plugin, which I’m also using.
And with that, everything was set up. Well, everything except for one thing: remote publishing. My local Octopress repository lives in my iMac, which generates the entire site every time I publish a new entry and then pushes it to GitHub. That means I need to physically be at my iMac whenever I want to publish new entries. That’s fine if I’m at home, but sometimes I like to work out of a local coffeehouse, or somewhere else, so I wanted to be able to do everything from my MacBook Pro for those times when I’m on the go.
There are several ways to achieve that, such as SSH tunneling into my iMac from my MacBook Pro, but those require the iMac to be on at all times. In the end I decided to do a second clone of my GitHub repo in my MacBook Pro, so that both computers can work together as equals. To do that, I followed this great post by Robert Anderson. It’s actually pretty simple, but be particularly careful when switching computers, as you need to pull the changes from GitHub before you do anything else in order to stay in sync and avoid merging conflicts.
That’s it. Once everything was done, I only needed to point my domain name to GitHub pages and wait for the DNS to propagate through the network. This article is the first entry to be published only on the new site, so if you’re reading this, it means it worked. Thanks for making it this far.
Conclusion
All in all, it took me about a week to get everything done. It was a tedious process at times, but the end result is, I believe, much better and completely justifies the effort. Besides, it was a fine learning experience and now I feel like I’m in complete control of my site, which is just the way I like it.
I would like to take a moment now to thank all the fine folks that I’ve mentioned throughout this article. Without their help this would have been a considerably more challenging affair. Thanks to their generosity, passion and dedication, the Internet is a better place.
Now, let’s keep writing!


